Best Guide to Set Apple Music as Ringtone on iPhone 13
If you need to set custom ringtones for your iPhone, what do you usually do? Get music from Apple Music then choose a song as your favorite ringtone? Actually, you can have a better choice. If you are an Apple Music user, you can choose any song you like to set it as your ringtone according to this article. It's not hard to accomplish as long as you follow two parts below.
Part 1. Customize M4R Ringtones for iPhone 13
Firstly, you need to know, only "M4R" file can be set as ringtone on iPhone 13. Unlike on an Android device, you can not choose a song from a Music Library and set it as the ringtone. You need to customize the song as M4R file. thus, firstly, let's make it out.
🛠️ Tool Required:
A professional ringtone maker is necessary to download Apple Music tracks as plain formats. Apple Music is protected by a special format. It’s a pity that there is indeed no official solution. Only with a music downloader like AudiCable Audio Recorder can remove the restriction. By following steps, we customize ringtones for iPhone 13 with AudiCable, then apply one of them as your ringtone in the next part.
AudiCable Audio Recorder
- Download music from Spotify, Apple Music, Amazon Music, Tidal, Line Music, Deezer, YouTube Music, Pandora, etc.
- Save streaming music to MP3, AAC, WAV, FLAC, AIFF, ALAC.
- Support to add more music websites manually.
- Keep ID3 tags after recording.
- Keep original audio quality after conversion.
- Free updates & technical support.
Step 1 Choose Apple Music as Music Souce
Download and run AudiCable on your Mac or Windows computer. Click the "Apple Music" icon from the main interface. Then log in your Apple Music account.
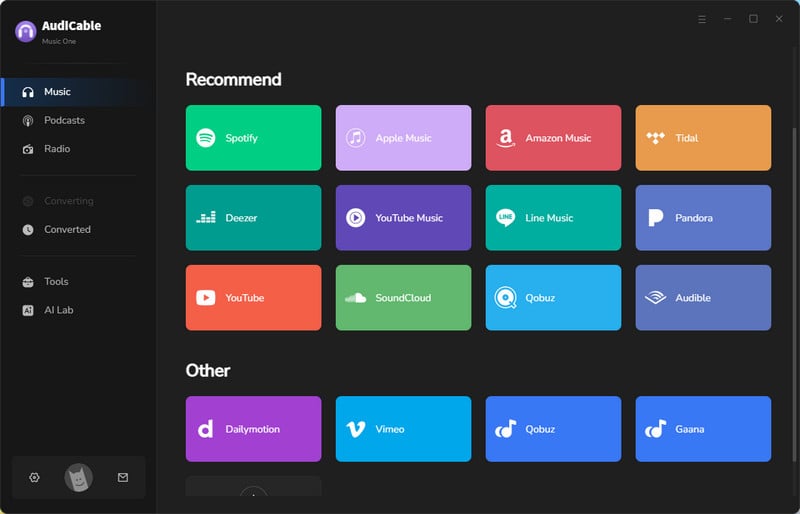
Note: Here we start an example of "Apple Music App" mode. If you'd like to change the download mode, just click the mode-swapping icon on the top right corner of the platform icon.
Step 2 Choose Output Parmeters
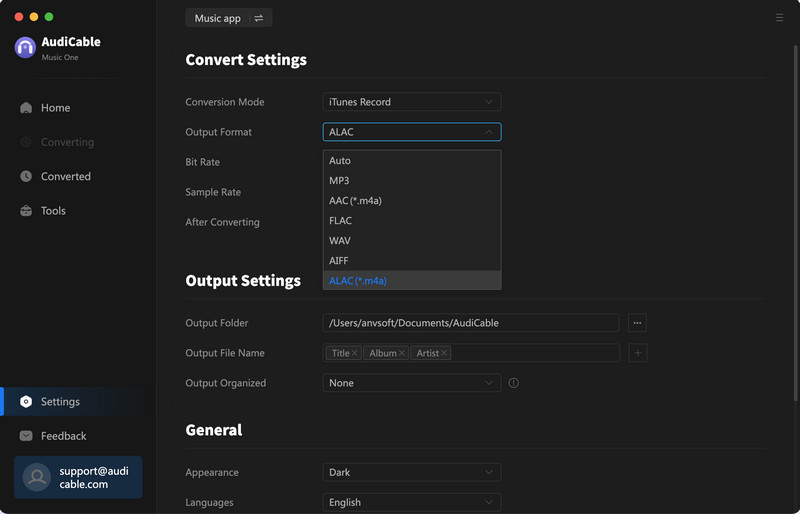
On the bottom-left corner of AudiCable, click "Settings". Then select "iTunes Record" as conversion mode, "MP3" as output format. To better organized the downloaded Apple Music files, you can create a new folder to store them.
Step 3 Add Apple Music to AudiCable
Click the "Add" button on the home page, then your iTunes library pops up and list all songs. Then check the songs you want to convert in the library, and click "OK".
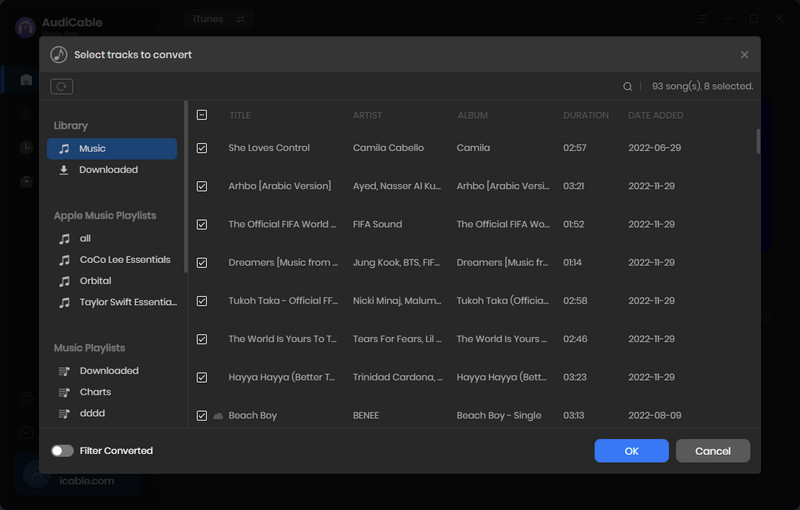
Note: If you choose to download music via the Web Download Mode, you can directly open a Apple Music playlist, album, or artist on the web player, then tap "+" button to parse music.
Step 4 Start Converting Apple Music
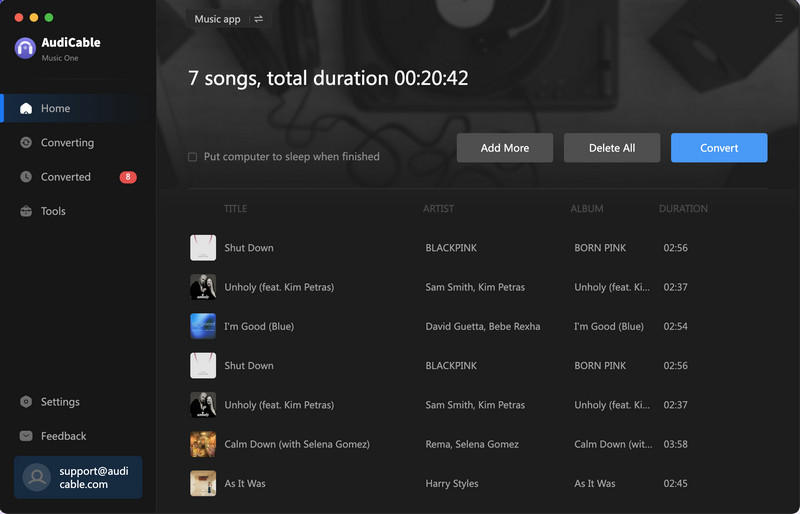
Click the "Convert" button, AudiCable will start converting Apple Music songs to the local drive. The recording process will be finished soon. If you want to stop the conversion, just click "Abort".
Step 5 Check Apple Music Files on the Computer
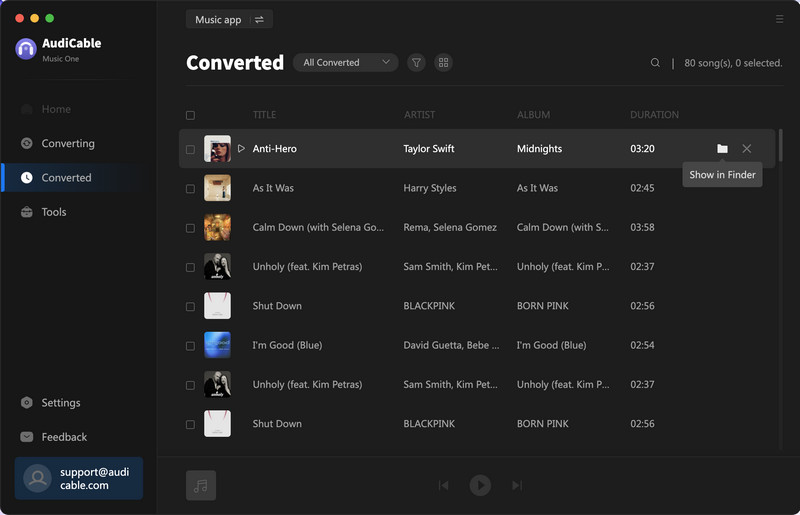
Once converted, tap "Converted" on the left tab, then click a "Folder" icon behind any song. You'll be directed to where converted Apple Music audio store.
Part 2. Apply the Customized Ringtone on iPhone 13
Firstly, we need another free tool to import the customized ringtones to your iPhone 13. To be honest, I have used this Syncios Mobile Manager free version for several years. It has a free version to transfer photos, videos, audios and other media files between a mobile device and PC. It's really a good helper for mobile devices. And as an onwer of iPhone, I will not upload files to my iPhone with iTunes. Because all the existing data will be overwritten. This is really unfriendly to iOS users. Thus, Syncios is always my first choice to export and import files when needed.
⚠ And most importantly, you can not import ringtones via iTunes! iTunes will delete all ringtones customized by a third-party tool automatically. And actually, there is no official way to customize ringtones. Therefore, do not even open iTunes when importing ringtones via Syncios on the computer!
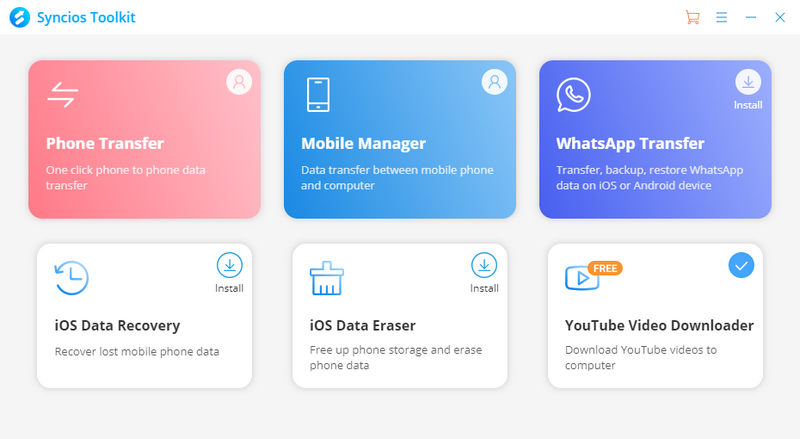
Step 1. Just click the "Download" button to get Syncios from its official website then start this program. On the primary interface, head over to Mobile Manager. Do not run other program wrong. Then establish a connection between your iPhone 13 and computer via a USB cable.
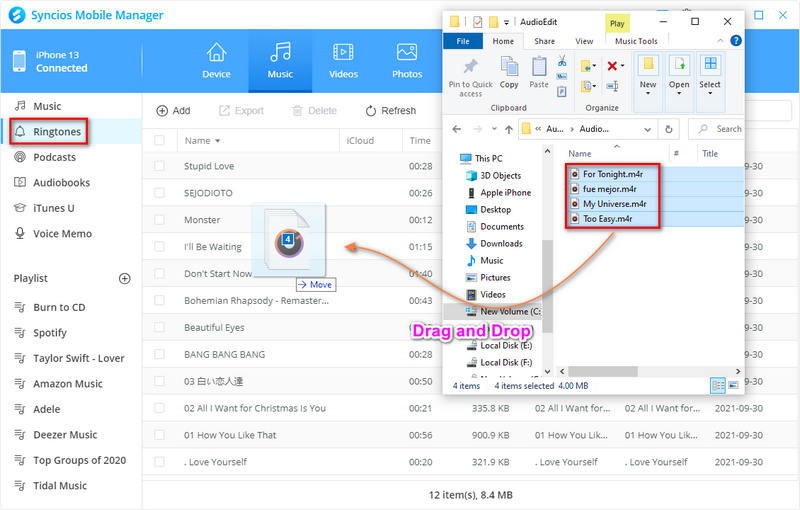
Step 2. Go to Music > Ringtones. Click Add to import the M4R customized ringtones from the computer.
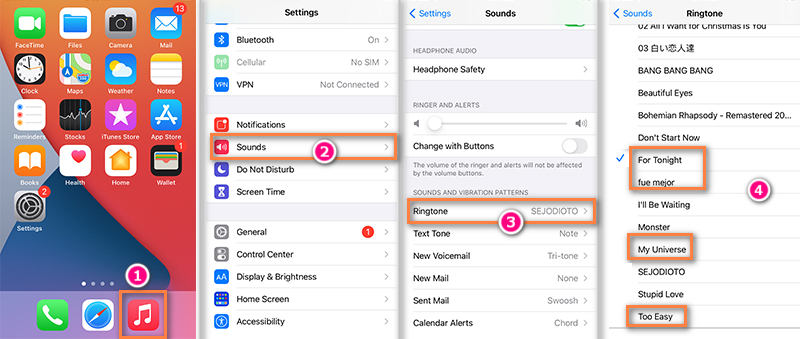
Step 3. Unlock your iPhone. Go to Settings > Sounds > Ringtone. On the top of ringtone list, you need find the newly imported ringtones. Just choose your favorite one as the ringtone on your iPhone 13.
📑 Disclaimer
- All these methods are for personal or educational use only.
- You should not use this tool to private or distribute music.
Conclusion
After reading this article, you should get a perfect way to customize Apple Music as ringtones via the help of AudiCable Audio Recorder. And now you can easily choose your favorite song as iPhone 13 ringtone. This fabulous music downloader makes it possible to own a more personalized iPhone 13. Download it and have a free trial right now! If you find this guide is useful, please share it with people around you.
Related Articles
- How to Convert M4B iTunes Audiobooks to MP3 Files
- How to Set a Sleep Timer for Apple Music
- How to Stop Apple Music from Auto-playing - 2025 Best Guide
- Three Ways to Listen to Apple Music Songs on Roku
- How to Add Apple Music to Virtual DJ for Mixing
- Quick Guide to Download Apple Music Songs to AIFF
- Quick Guide to Burn Apple Music Songs onto a CD
- How to Keep Apple Music Songs Forever after Unsubscribing
- How to Download Apple Music Songs to PC


