How to Use AudiCable Audio Recorder
AudiCable Audio Recorder for Windows provides all streaming music users with the best solution to download any songs to plain MP3/AAC/FLAC/WAV/AIFF/ALAC at 10X faster speed. This tool keeps 100% original audio quality and ID3 tags after conversion.
Go to AudiCable for Mac tutorial >>

How to Register AudiCable Audio Recorder on Windows
Step 1 Launch AudiCable Audio Recorder on PC.
Step 2 Please click the "profile" icon on the bottom left, then a registration box will pop up here. Or click the "Menu > Register" option in the upper right menu bar to show the registration interface.
Step 3 Directly copy and paste the registration Email and Code into the registration window.
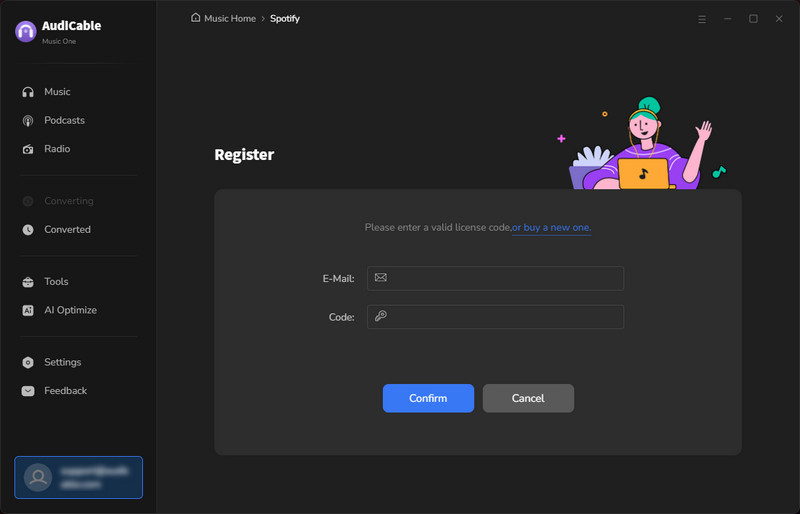
Note: The registration information is case-sensitive. So please do not add a blank at the beginning or end of the serial numbers.
How to Convert Music with AudiCable Audio Recorder for Windows
With the most up-to-date audio conversion technology, AudiCable Audio Recorder is born to convert any songs/albums/artists to plain MP3, AAC, FLAC, WAV, AIFF, and ALAC at up to 10x faster speed. After conversion, you are able to enjoy streaming music on all of your devices without any limitations.
Step 1 Choose the Desired Music Platform
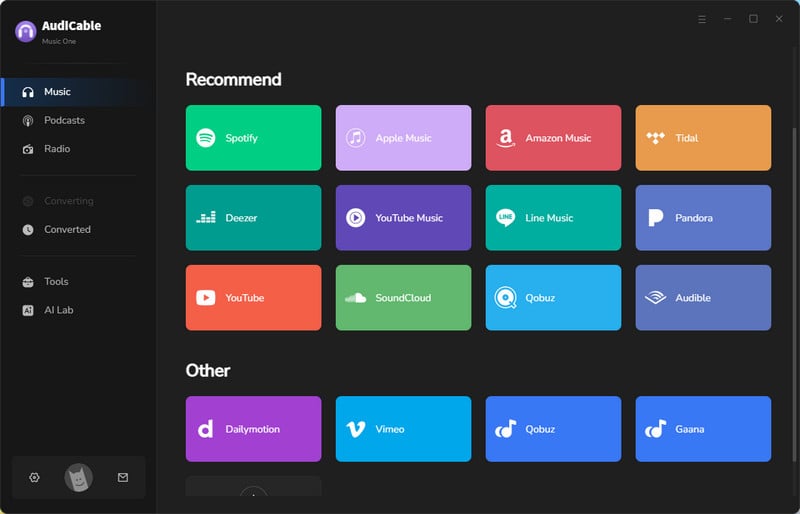
Run the AudiCable program on your computer. Please select the target music service and the download mode on the Music interface. We start with an example of "Spotify App Mode" here. To download music from the web player, just click the Switch to Spotify Web Player at the top right corner.
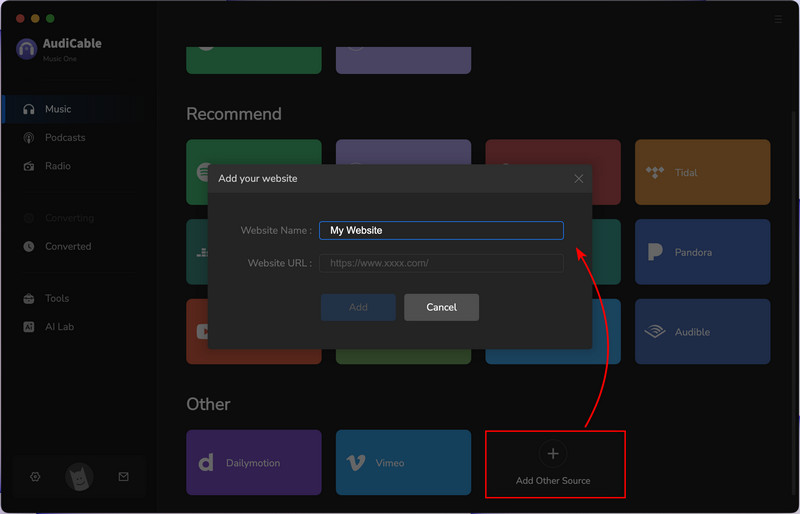
Note: If you want to extract music from other music outlets that aren't on the list, click the "Add other source" button. Then copy the official website address and the platform name, and then successfully add a new music platform.
Step 2 Customize Output Settings
Click Settings on the left tab. Here choose Conversion Mode, Output Format, Output Path and others. For better organizing your music library, you can create a new local folder to save the output audio files.
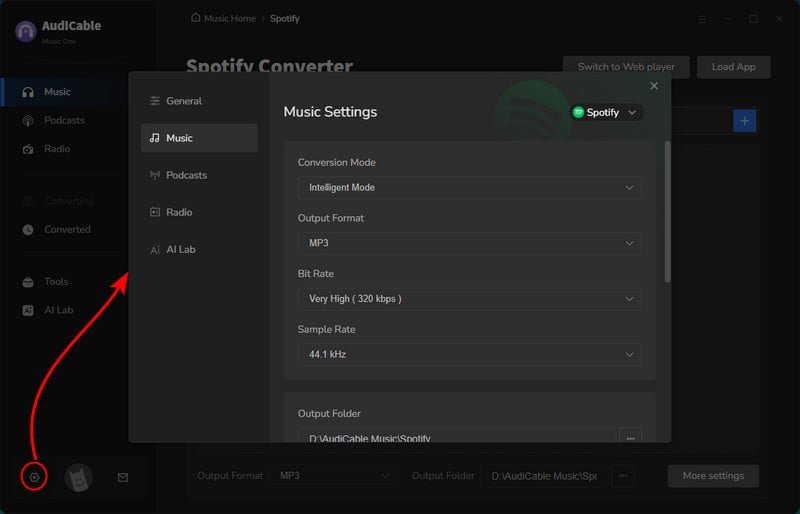
Note: You can also adjust the music settings in the Music tab. Click "More settings" to show all output parameters.
Step 3 Add Tracks/Playlist to AudiCable
You can directly drag & drop or the album or playlist from the music app to AudiCable. Or copy & paste the playlist link to the URL search box of the AudiCable. Then tick the songs you want to convert in the queue, and click "Add".
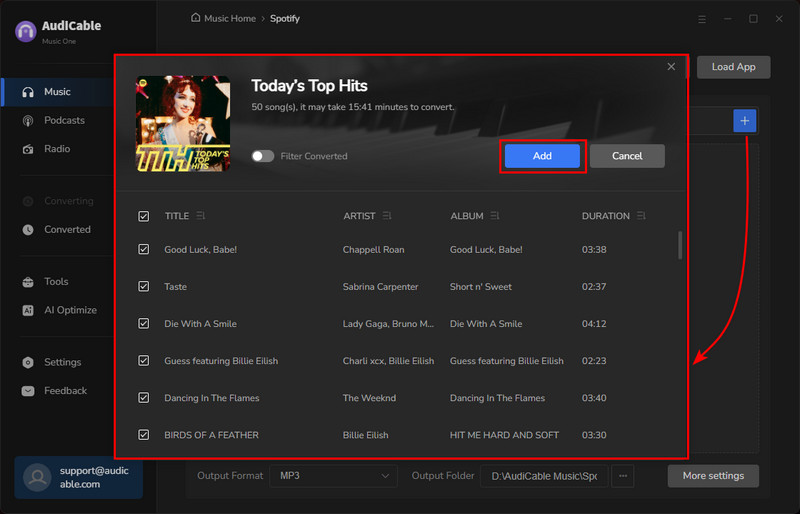
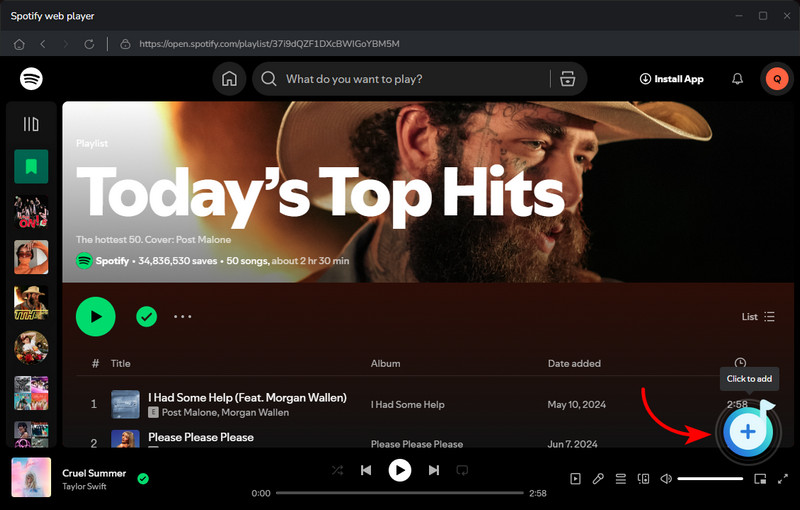
Note: If you choose to download music via the Web Download Mode, open a playlist, album, or artist on the web player, then tap the "Click to add" button to parse music.
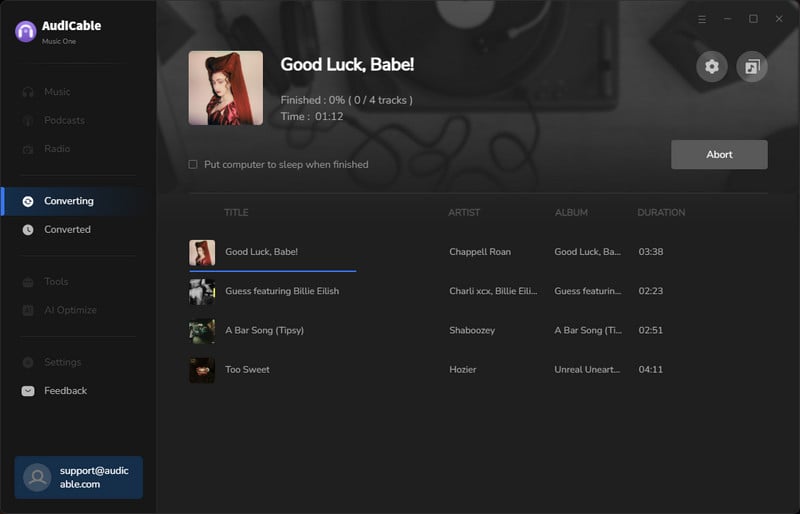
Step 4 Start Converting Music
Click the "Convert" button, and AudiCable will start converting songs to the local drive. The recording process will be finished soon. If you want to stop the conversion, just click "Abort".
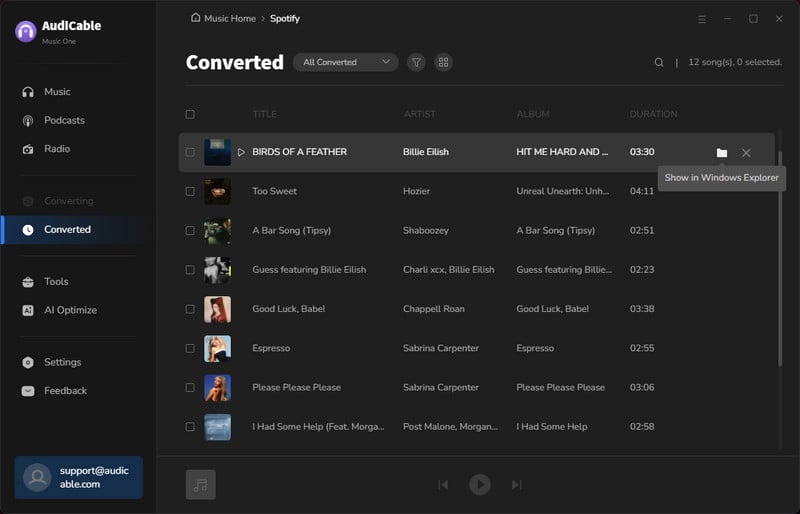
Step 5 Check Recorded Music
Once converted, tap "History" on the left tab, then click a "Folder" icon behind any song. You can find converted audio files as the local folder pops up. If you want to delete the download history or audio files from the local folder, right-click and select "Delete".
💬 Video Tutorial - How to Use AudiCable Audio Recorder for Windows
For more useful tips about using AudiCable Audio Recorder, please go to Video Tutorial.
More Tools on AudiCable
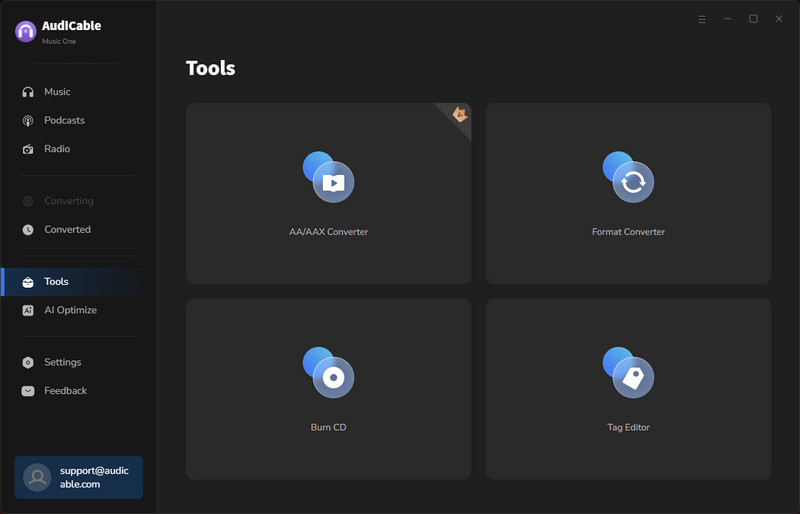
AudiCable provides a complete set of audio tools for users, including Format Converter, ID3 Editor, CD Burner, AI Audio Splitter, AA/AAX Audiobooks Converter.
1. Podcasts Downloader
The built-in podcasts downloader supports playing and converting popular podcasts to local MP3, MP4, or other formats. Click "Podcasts" on the left panel, select the episode by genre, or directly query the show in the search box. Then click the download button, AudiCable will free download podcasts to computer at a fast speed.

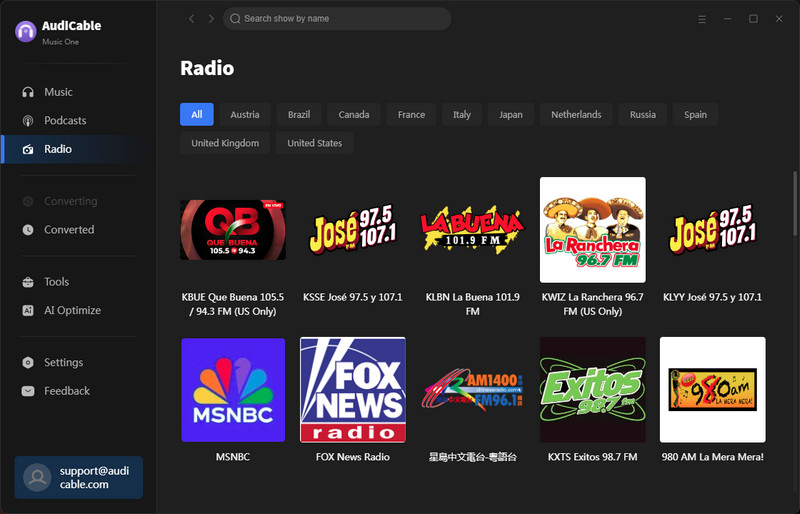
2. Radio Recorder
The easy-to-use radio downloader effortlessly records online radio shows as MP3, AAC, FLAC, WAV, AIFF, and ALAC. Click "Radio" on the left panel, filter the radio station by country, or directly enter the radio name in the search zone. Then click the Click to Record button, AudiCable will download internet radio to the computer.
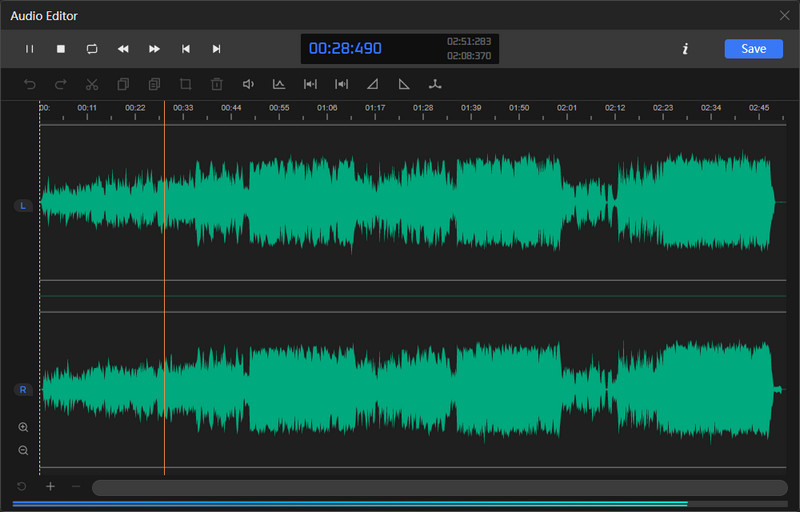
3. Audio Editor
To edit and manipulate converted audio files, go to Tools > Audio Editor. Import the local song, and then you're free to cut, copy & paste parts of a track; adjust loudness; and add basic effects.
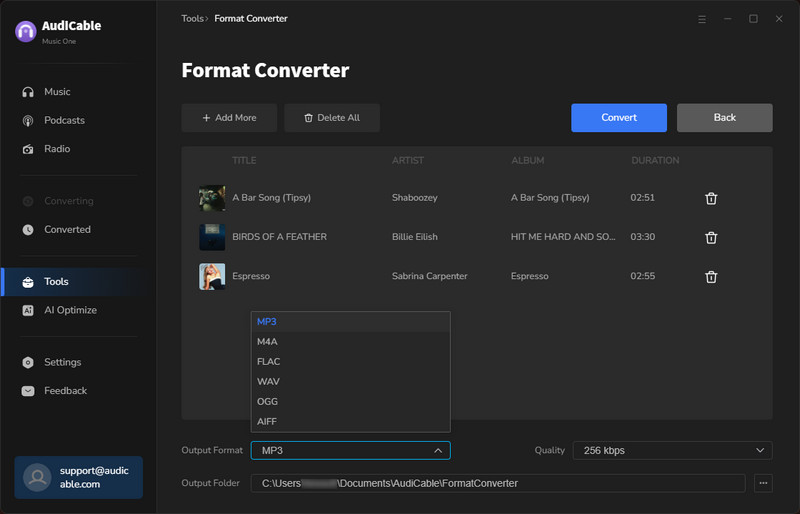
4. Format Converter
To convert the local tracks to other audio formats, go to Tools > Format Converter. Click the +Add icon to import music from the computer, then set up the output format.
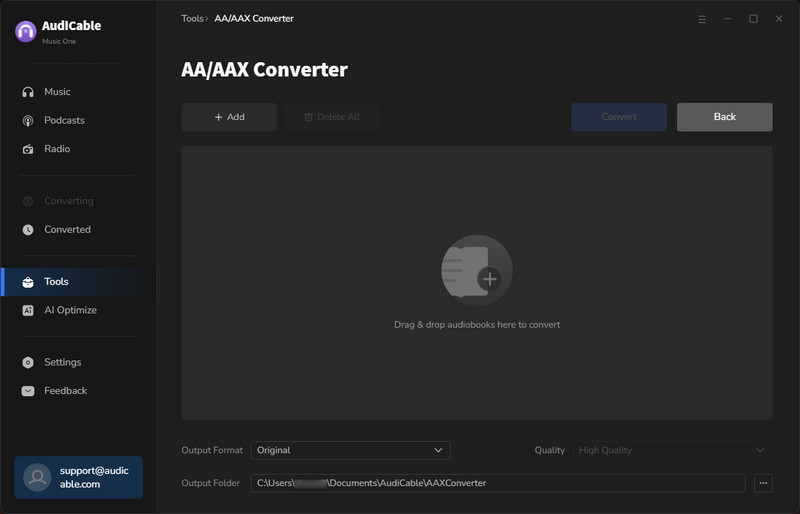
5. AA/AAX Converter
To convert local AA/AAX files, go to Tools > AA/AAX Converter. Drag and drop the local audiobooks to the parsing zone. Later select the Output Format, Output Quality and Output Folder to apply the changes.
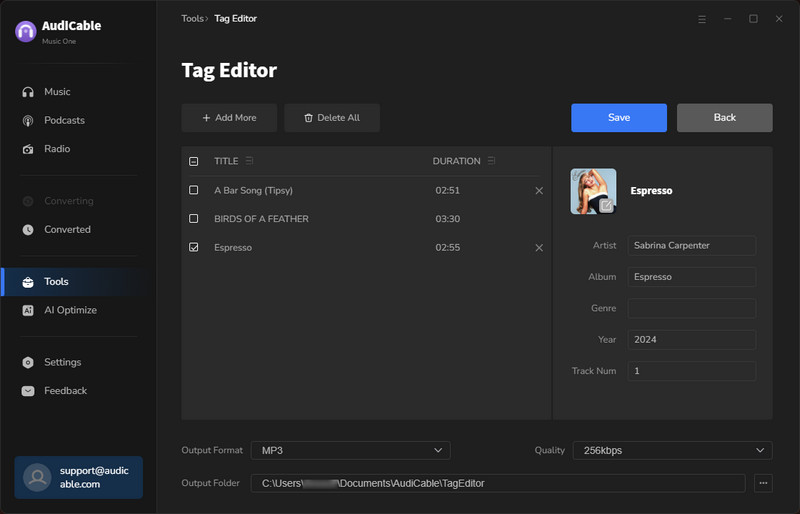
6. Tags Editor
To edit the tag information of a song, go to Tools > Tag Editor. Edit its cover, title, artist, album, genre, year, and track number according to your needs. Later click Save to apply all changes.
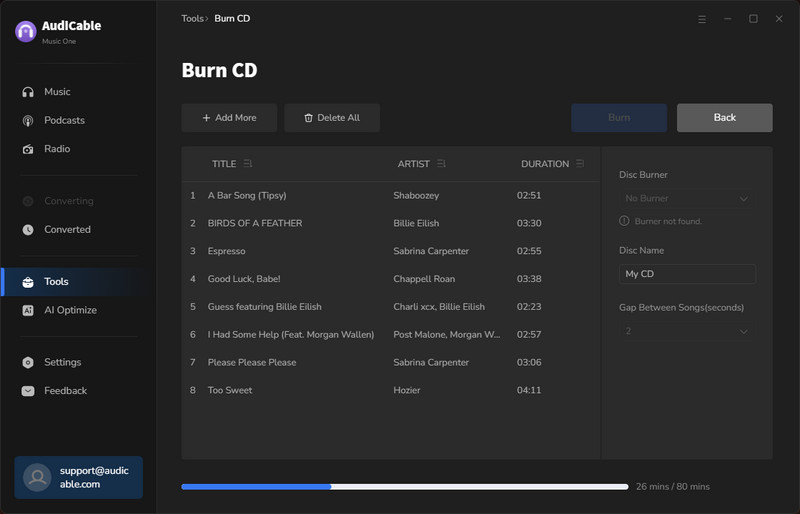
7. CD Burner
To copy and burn music to your CD, go to Tools > Burn CD. Insert a blank disc into your CD or DVD burner. Click the "Burn" button to start burning.
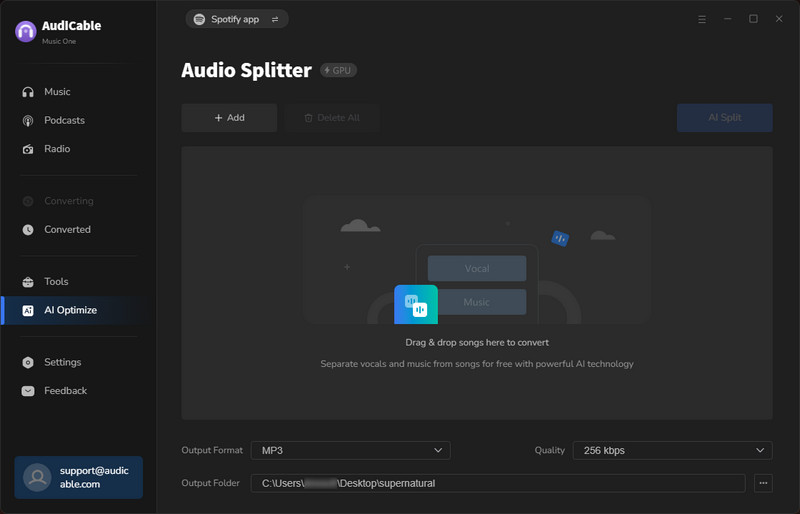
8. AI Audio Splitter
To remove vocals from any audio, click AI Lab on the left panel. Click the +Add button to import audio files, then the AI tool automatically separates vocals out of songs while keeping high audio quality.